Helifix BowTie
Helifix BowTie

Helifix BowTie
For restraining bowed walls
The Helifix BowTie is a long stainless steel tie used to stabilise bulging walls, without any external plates, by securing them into the ends of internal floor joists.
Send a product enquiryThe Helifix BowTie is a long stainless steel tie used to stabilise bulging walls, without any external plates, by securing them into the ends of internal floor joists.
The Helifix BowTie HD is a heavy duty 12mm diameter threaded bar with self-cutting end used to restrain bowing building walls by securing them to internal parallel floor joists or roof beams.
System Components
- Drill bit for clearance hole
- Helifix BowTies
- Power support tool
- HD Driver
- Hand support tool
- Helifix PolyPlus resin cartridge with extension nozzles and applicator
Applications
- For stabilising bowed external building walls by securing them to internal floor and ceiling joists
- Standard Helifix BowTies are recommended when installing into joist ends
- Helifix BowTie HDs are recommended when installing into joist sides
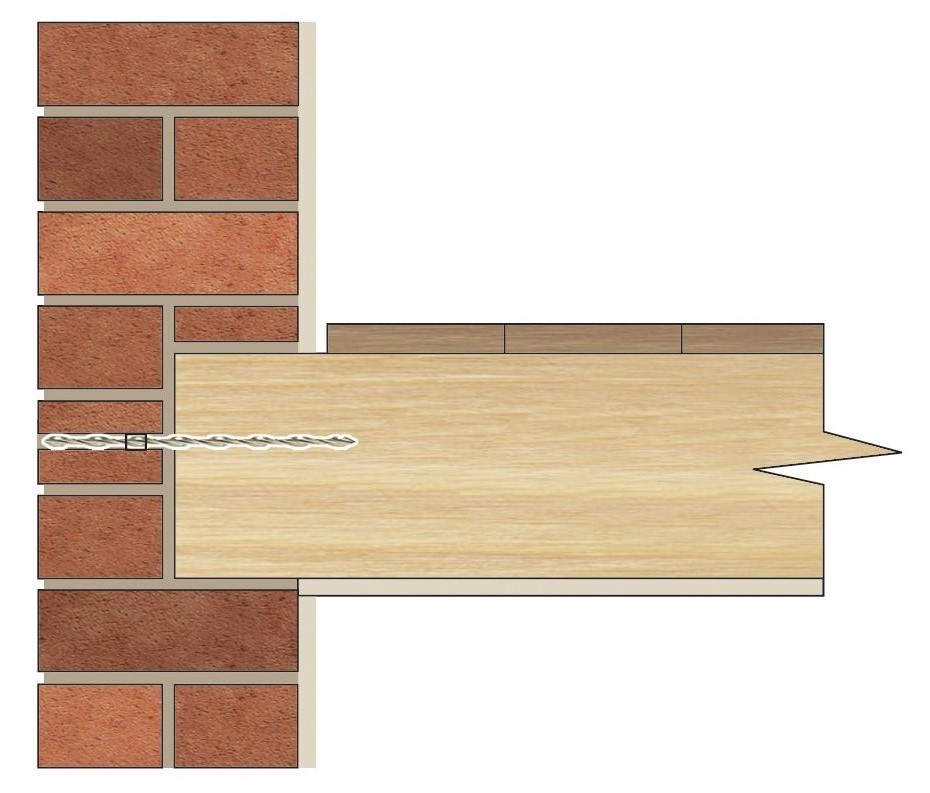
Helifix BowTie into joist end through a solid wall
Helifix BowTie Installation
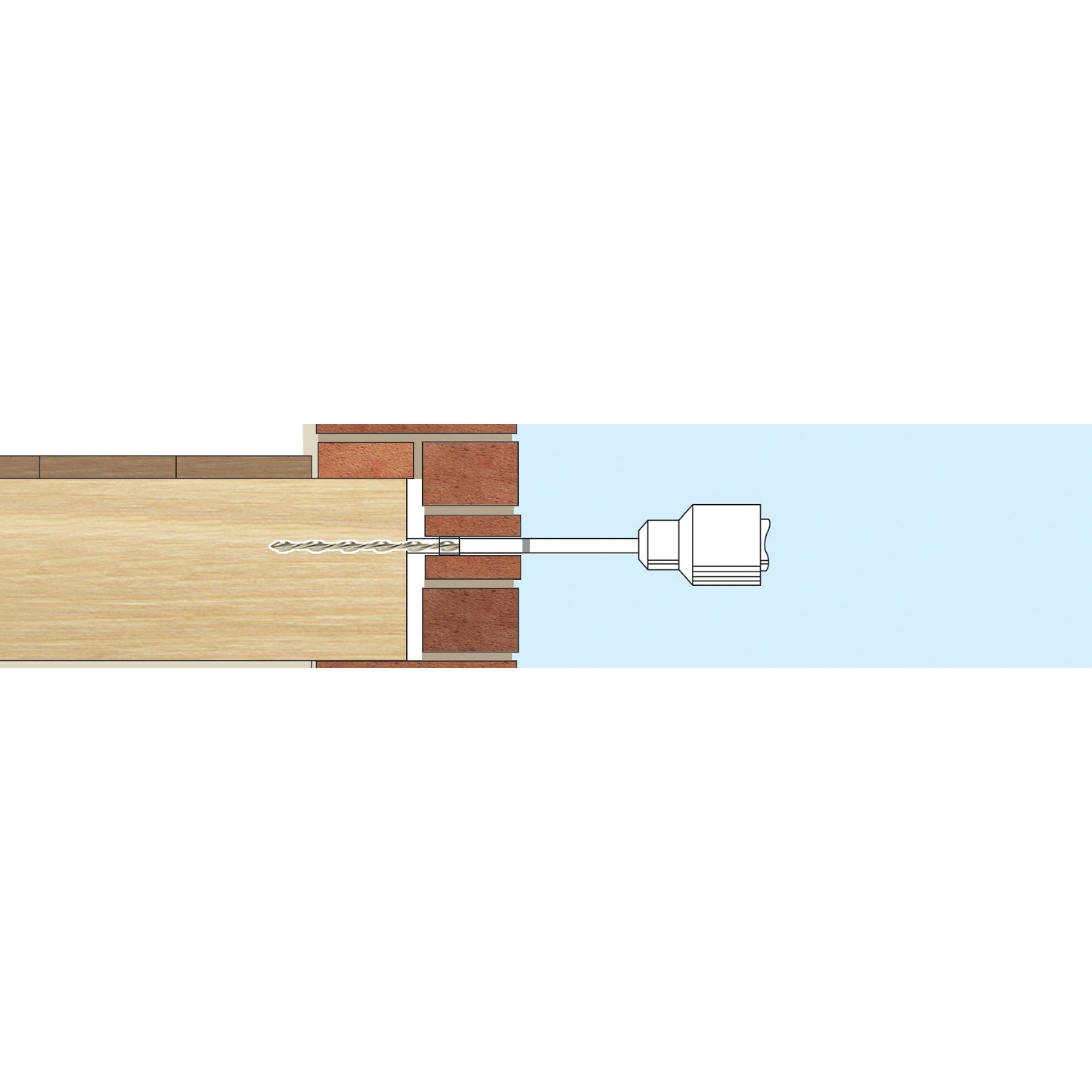
Step 1.
Mark the position of the joist centre on the external wall and then drill a clearance hole (normally 12mm) through the wall (and first joist if parallel to the wall). Clean out the hole
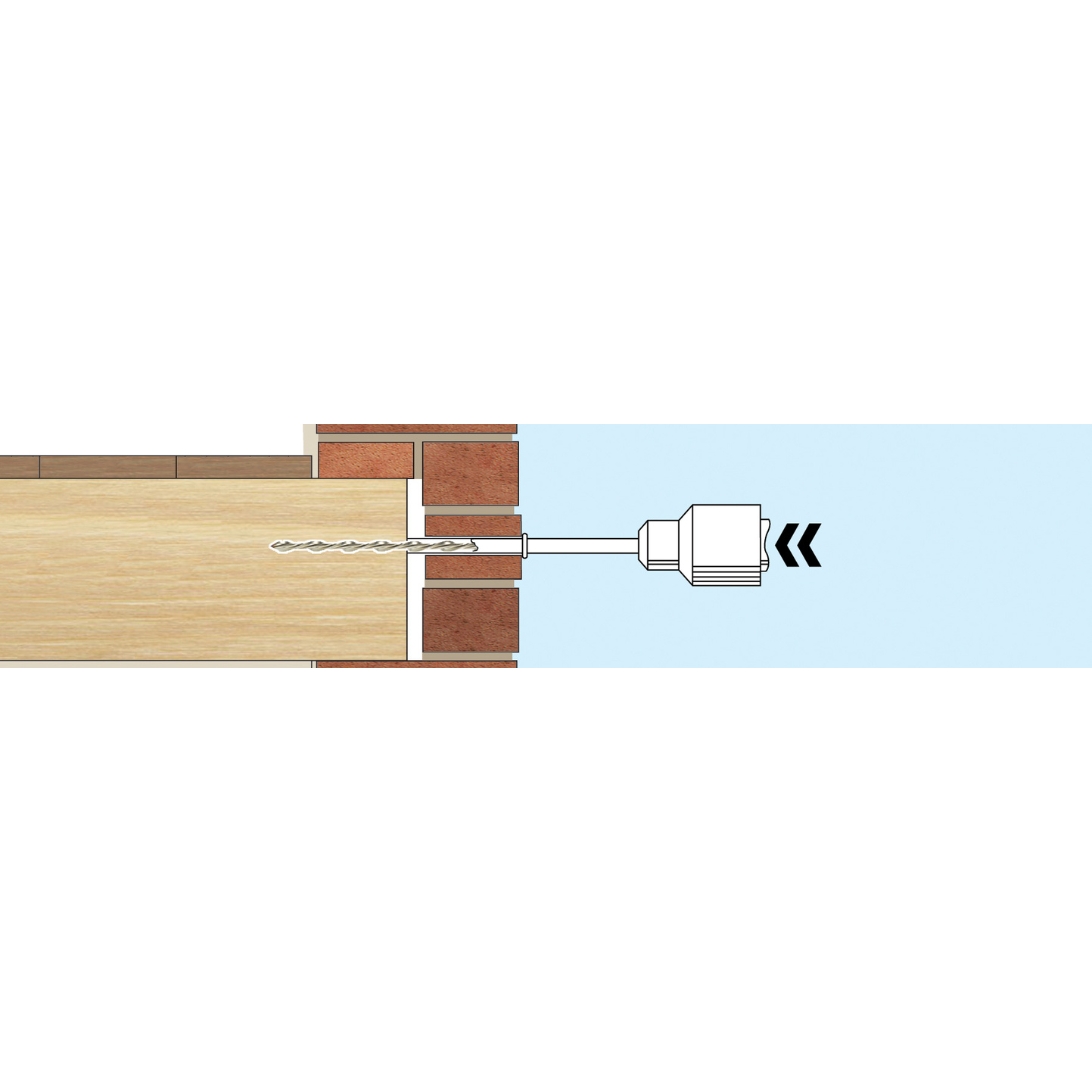
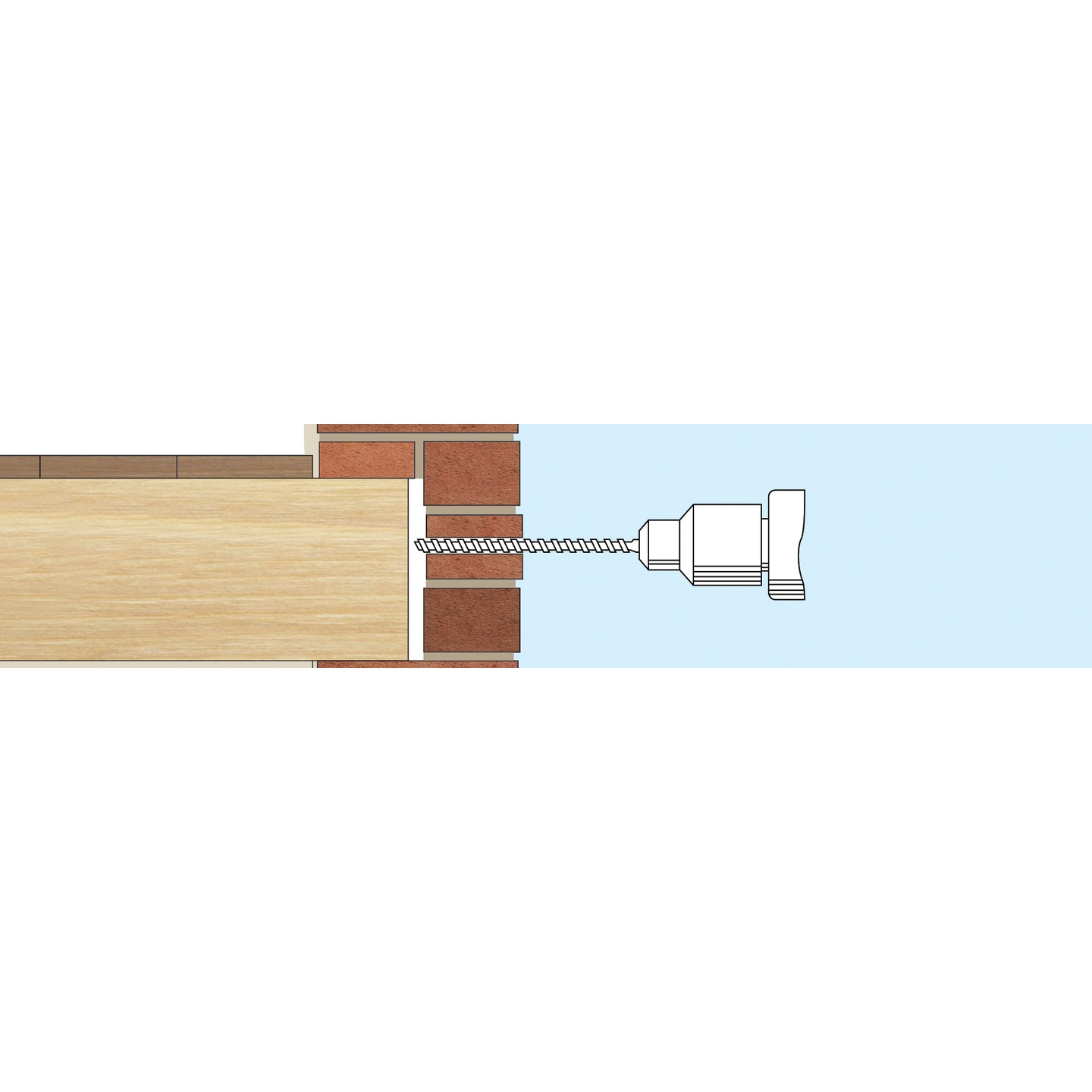
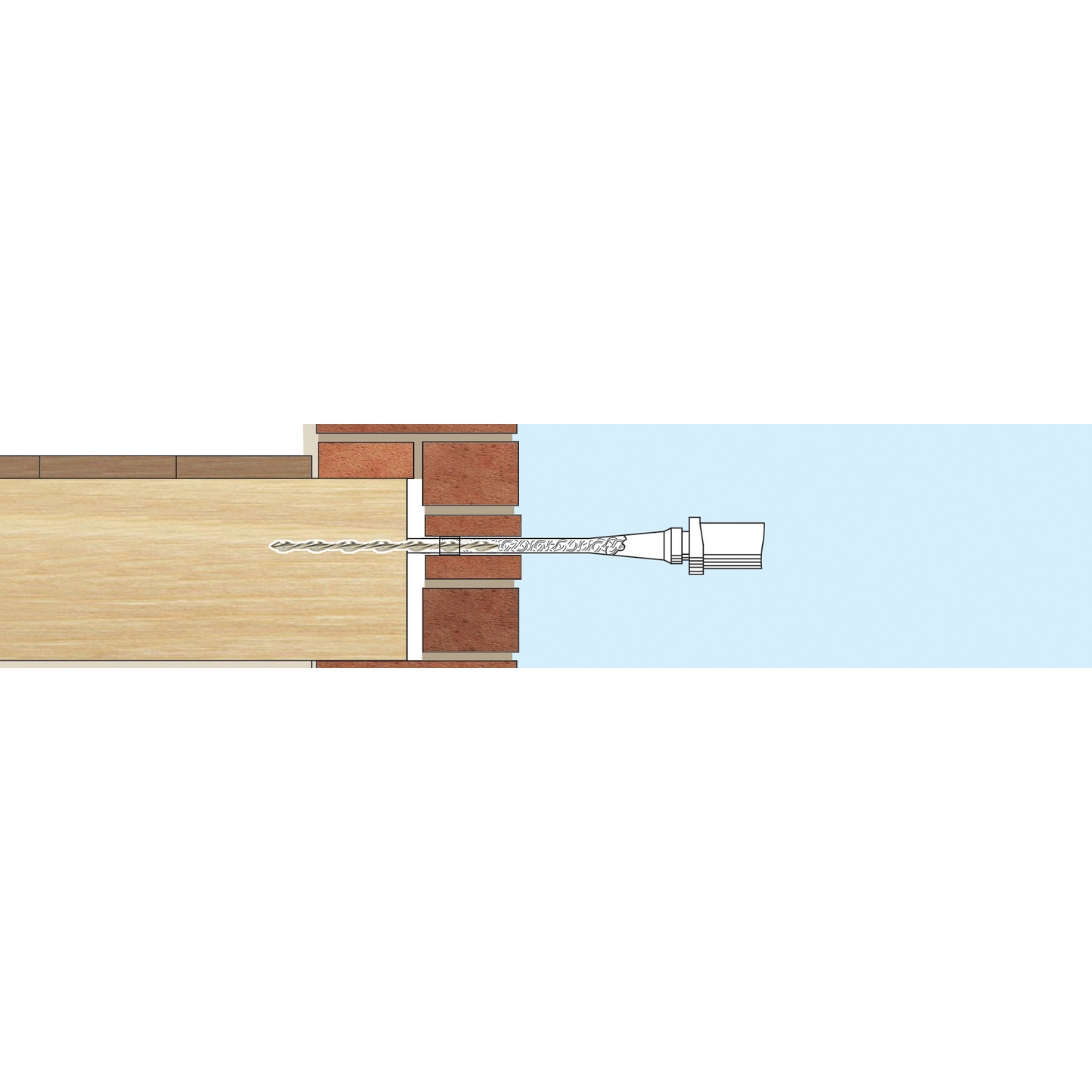
Step 2.
Fit the Helifix BowTie Support Tool to an SDS rotary hammer drill, insert the Helifix BowTie and drive it into joist end to the required depth – at least 75mm (or through the second joist if parallel)
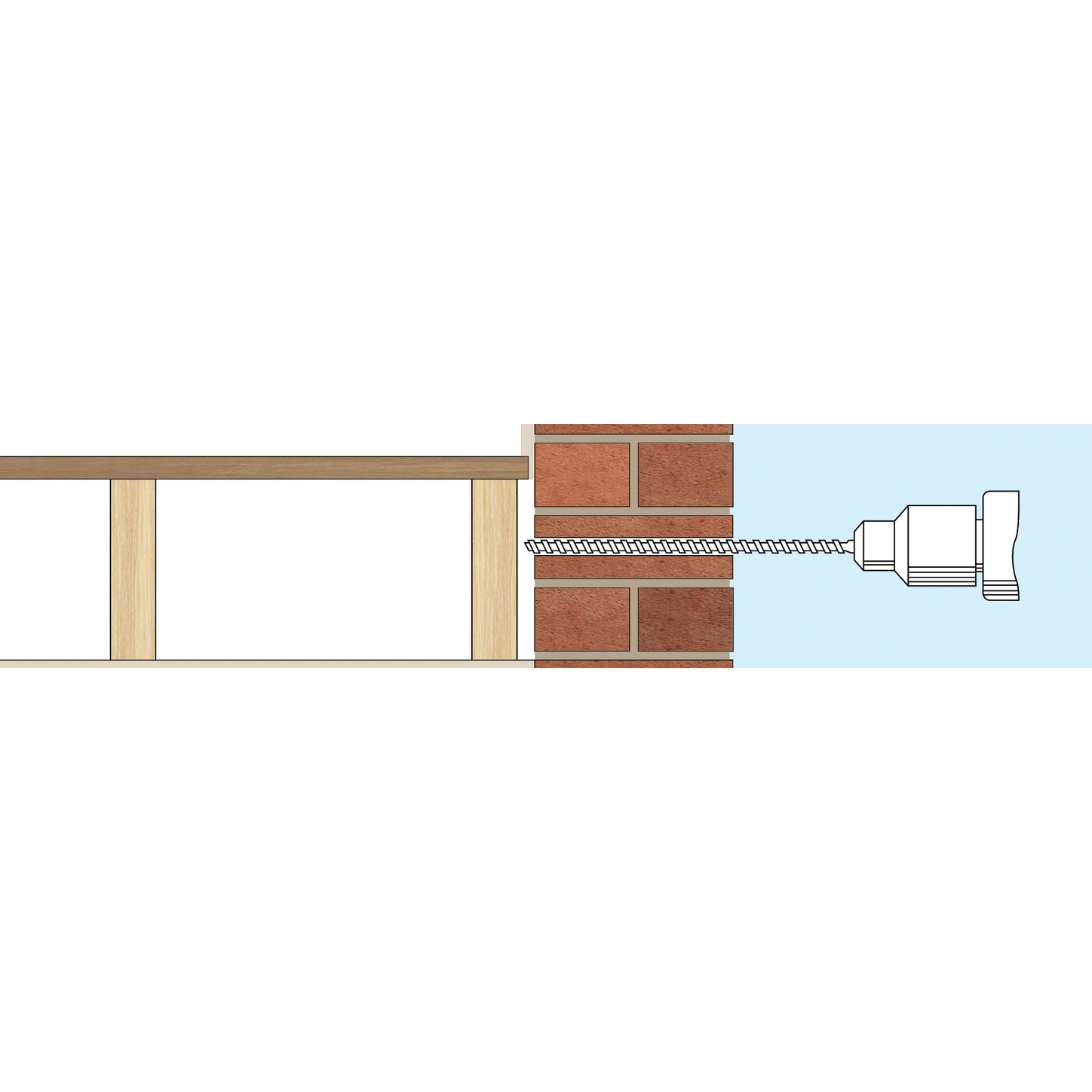
Step 3.
Fit the plastic sleeve over the Helifix BowTie and use the support tool to push it to the back of the hole in the masonry (in the outer leaf in a cavity wall)
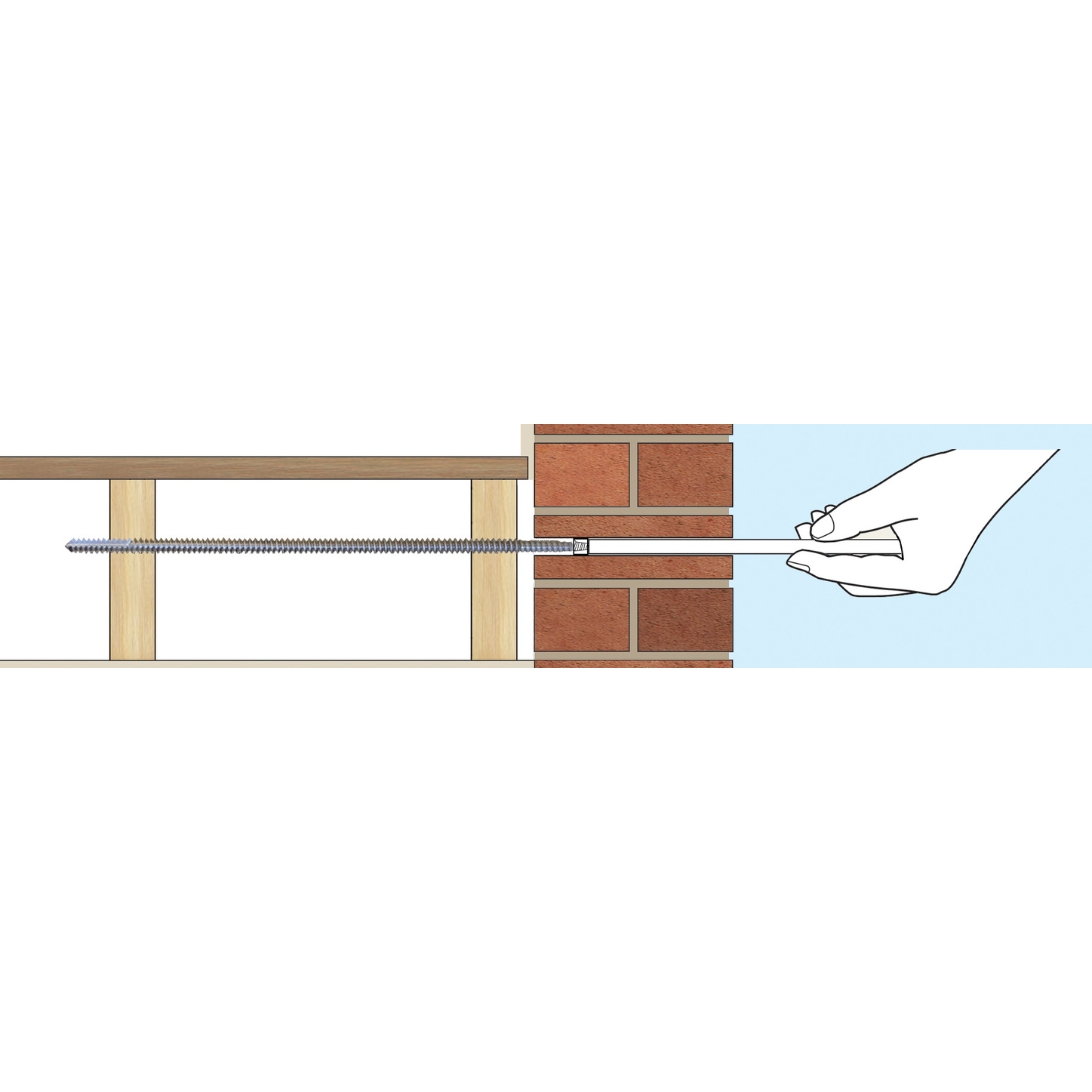
Step 4.
Inject Helifix PolyPlus resin to fill the hole and bond the Helifix BowTie to the masonry and then make good
Helifix BowTie HD Installation
Step 1.
Mark the position of the joist centre on the external wall and then drill a clearance hole (normally 16mm) through the wall. Clean out the hole

Step 2.
Fit the Helifix BowTie HD Support Tool to an SDS rotary hammer drill, insert the Helifix BowTie HD and drive it (off hammer) into, and through, the first and second joists
Step 3.
Fit the plastic sleeve over the BowTie HD and use the support tool to push it to the back of the hole in the wall (outer leaf in a cavity wall)

Step 4.
Inject Helifix PolyPlus resin to fill the hole and bond the Helifix BowTie HD to the masonry, allow the resin to gel and then make good
Enquire Now
Mandatory Fields*
Find an Approved Installer
Helifix’s Approved Installers ensure customers can be confident that repairs are carried out using the latest techniques to obtain an efficient, reliable, cost-effective solution.
Find an approved installer