Helifix Crack Stitching Kit
Helifix Crack Stitching Kit
Helifix Crack Stitching Kit
Components for the effective and reliable stitching of cracked masonry
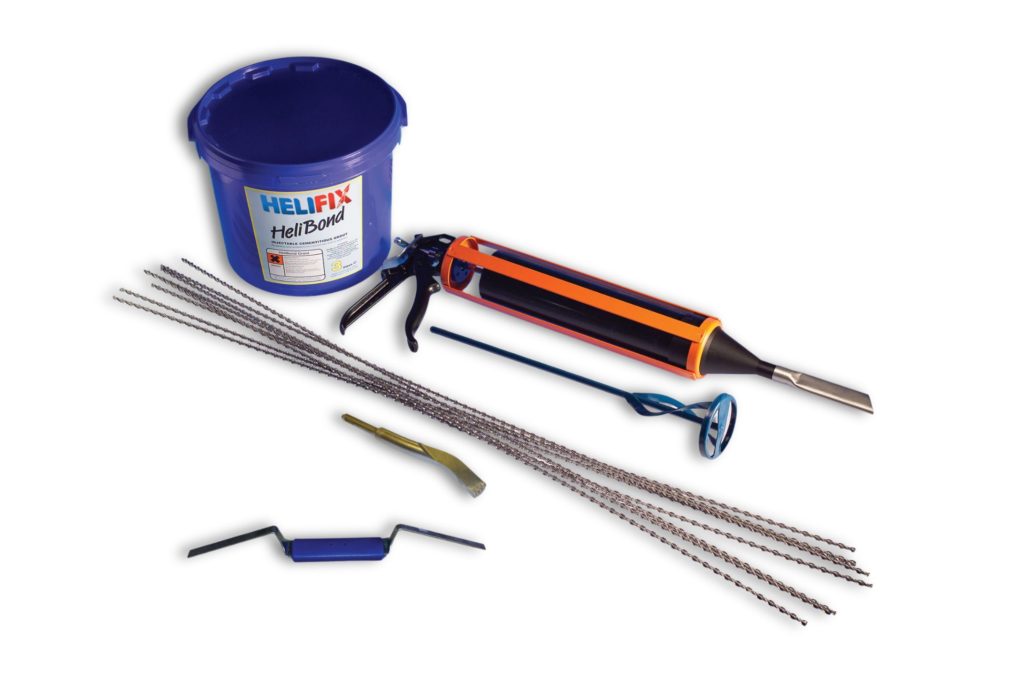
The Helifix Crack Stitching Kit contains the necessary components for the effective and reliable stitching of cracked masonry.
Send a product enquiryThe Helifix Crack Stitching Kit contains the necessary components for the effective and reliable stitching of cracked masonry. Bonding Helifix HeliBar stainless steel bars into appropriate bed joints or cut slot stabilises the masonry and redistributes tensile loads to minimise further development of the crack.
System Components
- 10 x 1m lengths of 6mm Helifix HeliBar
- 1 x 3 Litre tub of Helifix HeliBond cementitious grout
- Mortar chisel and rake
- Mixing paddle
- Applicator with fitted applicator nozzle
- *Required tool not included: 3-jaw-chuck power drill.
Additional Advice
Where two or more cracks are close together these may be stitched using one continuous length of Helifix HeliBar which must be long enough to extend 500mm beyond the outer cracks. e.g. if there are three cracks, each 250mm apart, then the overall length of Helifix HeliBar required would be 1.5m.
The horizontal slot, normally the mortar bed, can be cut using a twin diamond blade chaser with vacuum attachment, an angle grinder or a mortar chisel.
All mortar must be removed, together with any loose debris, to ensure a sound bond.
Prepare the slot with Helifix HeliPrimer or thoroughly wet the slot with clean water.
As standard, slots should be 10mm wide to accommodate the 6mm diameter Helifix HeliBar. For thin joints use 4.5mm Helifix HeliBar.
Helifix HeliBond grout is the recommended bonding agent. Helifix PolyPlus resin is used for smaller jobs or where loads are to be rapidly applied.
Installation
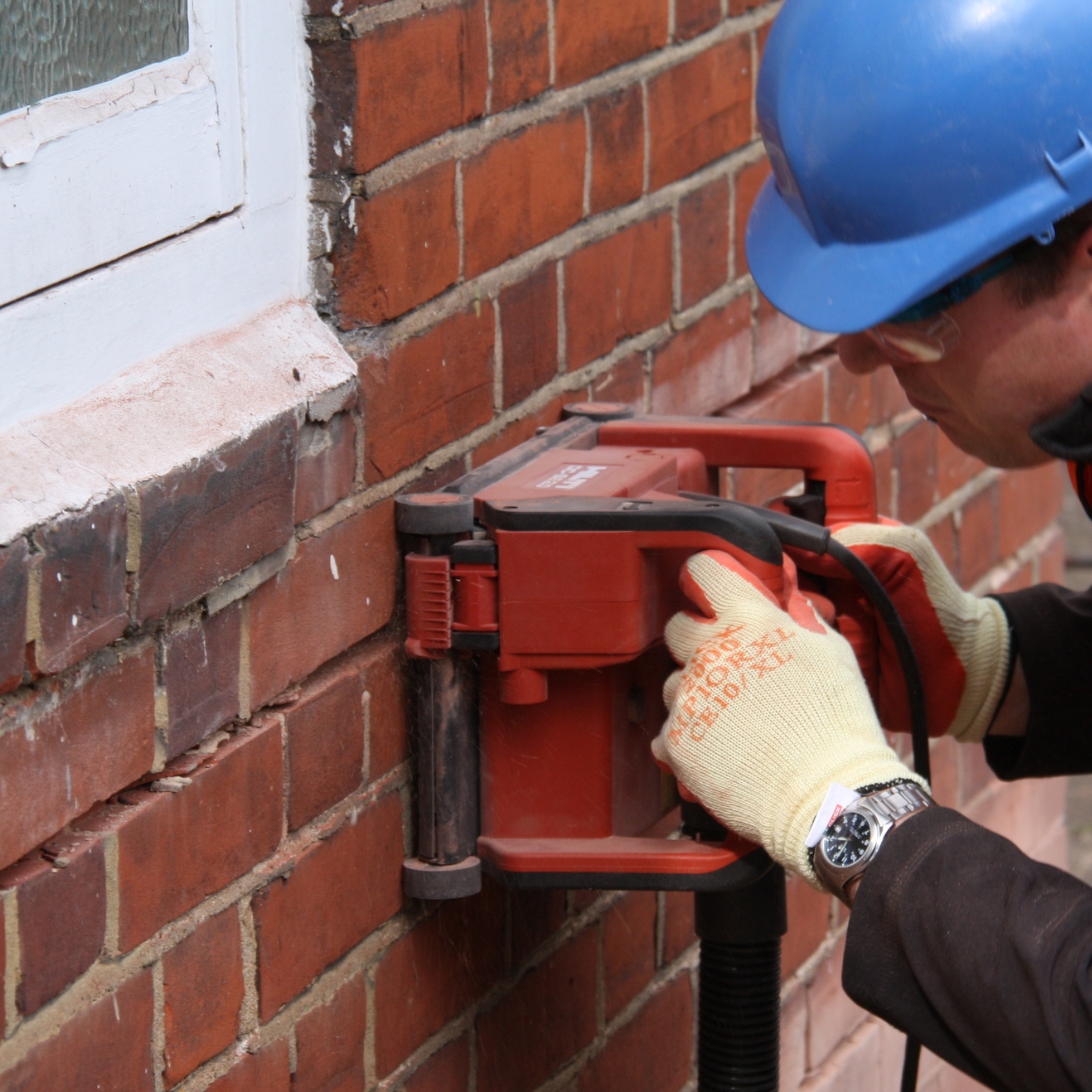
Step 1.
Rake out or cut slots into the horizontal mortar beds, a minimum of 500mm either side of the crack, to the specified depth.
Step 2.
Clean out slots with blow pump and apply Helifix HeliPrimer WB or flush with water.
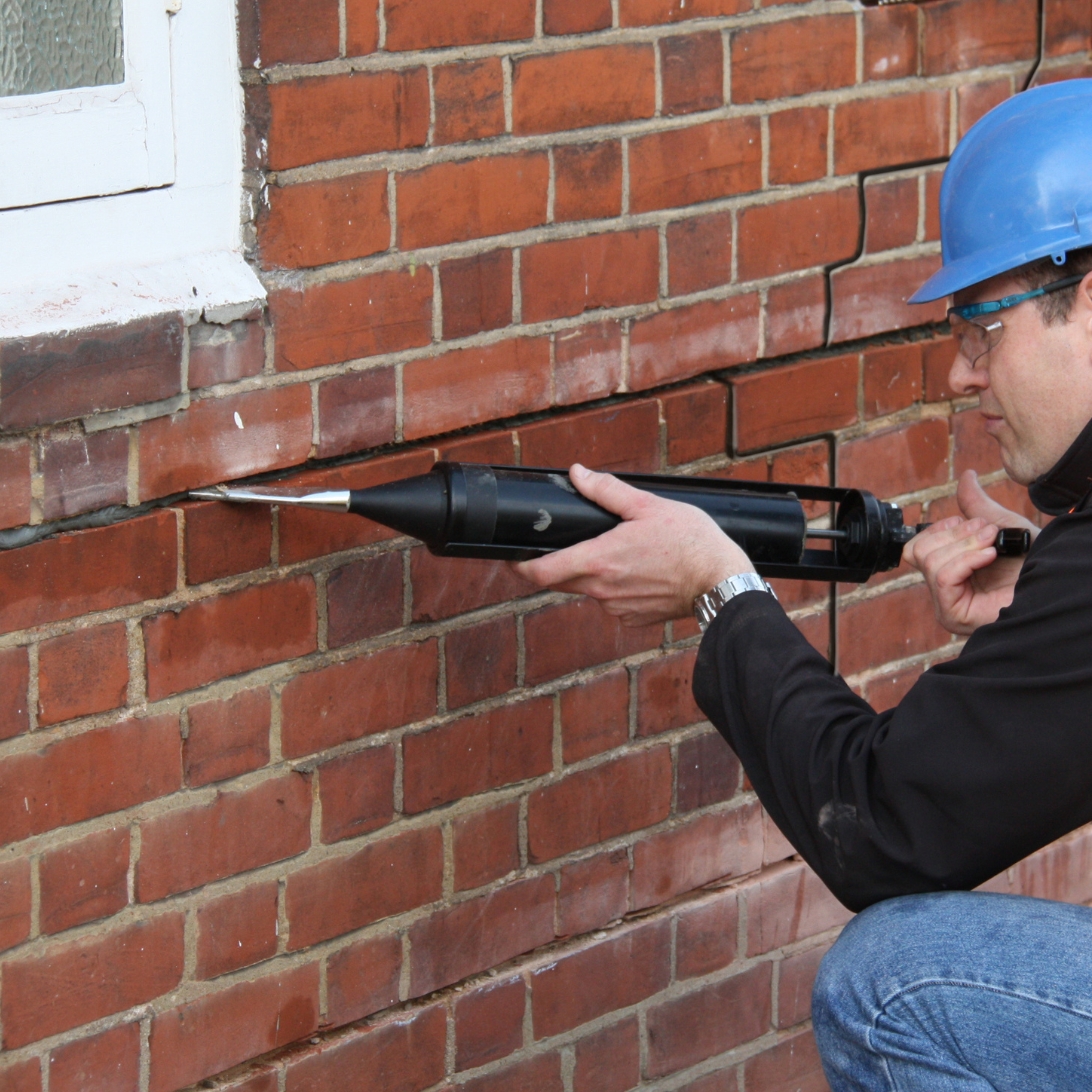
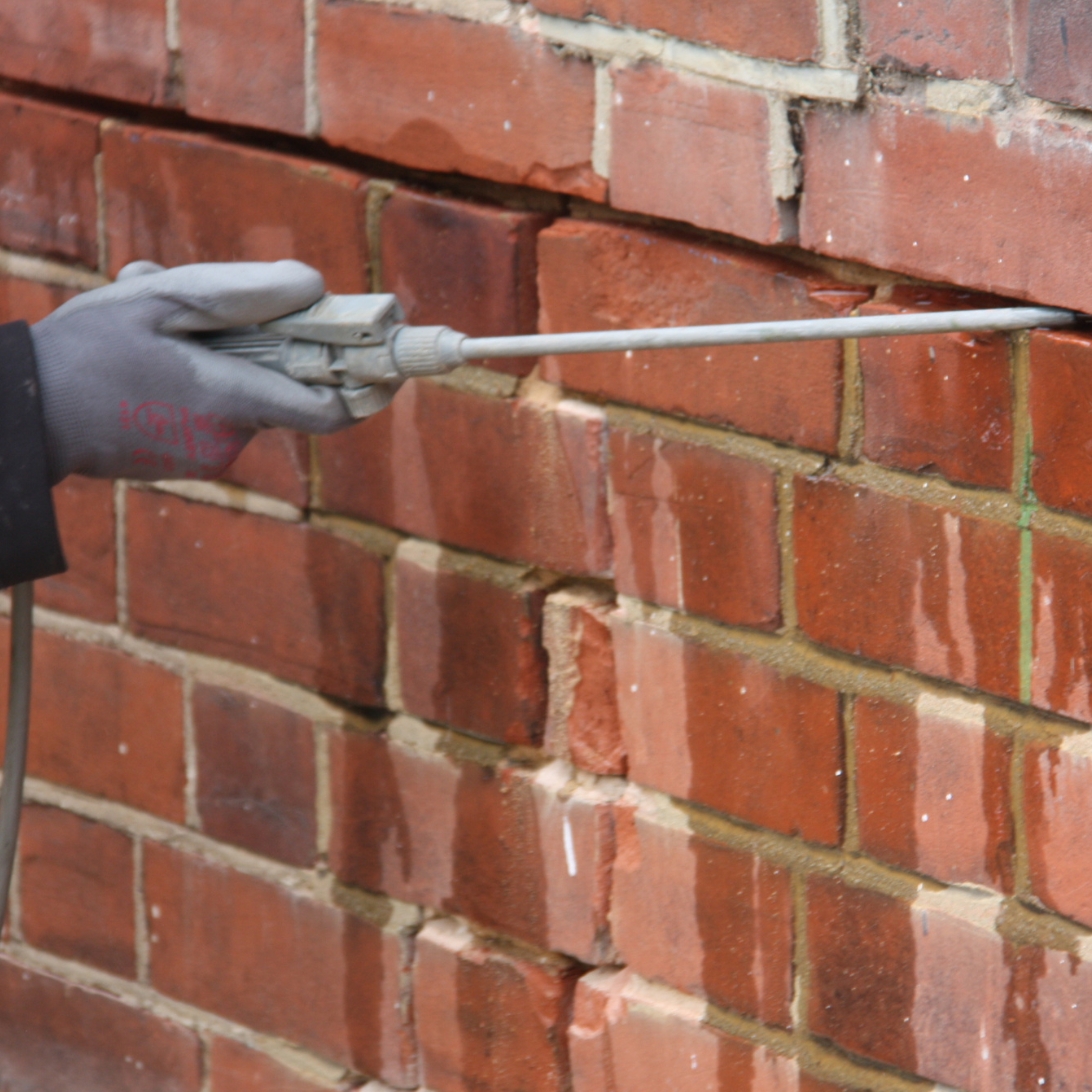
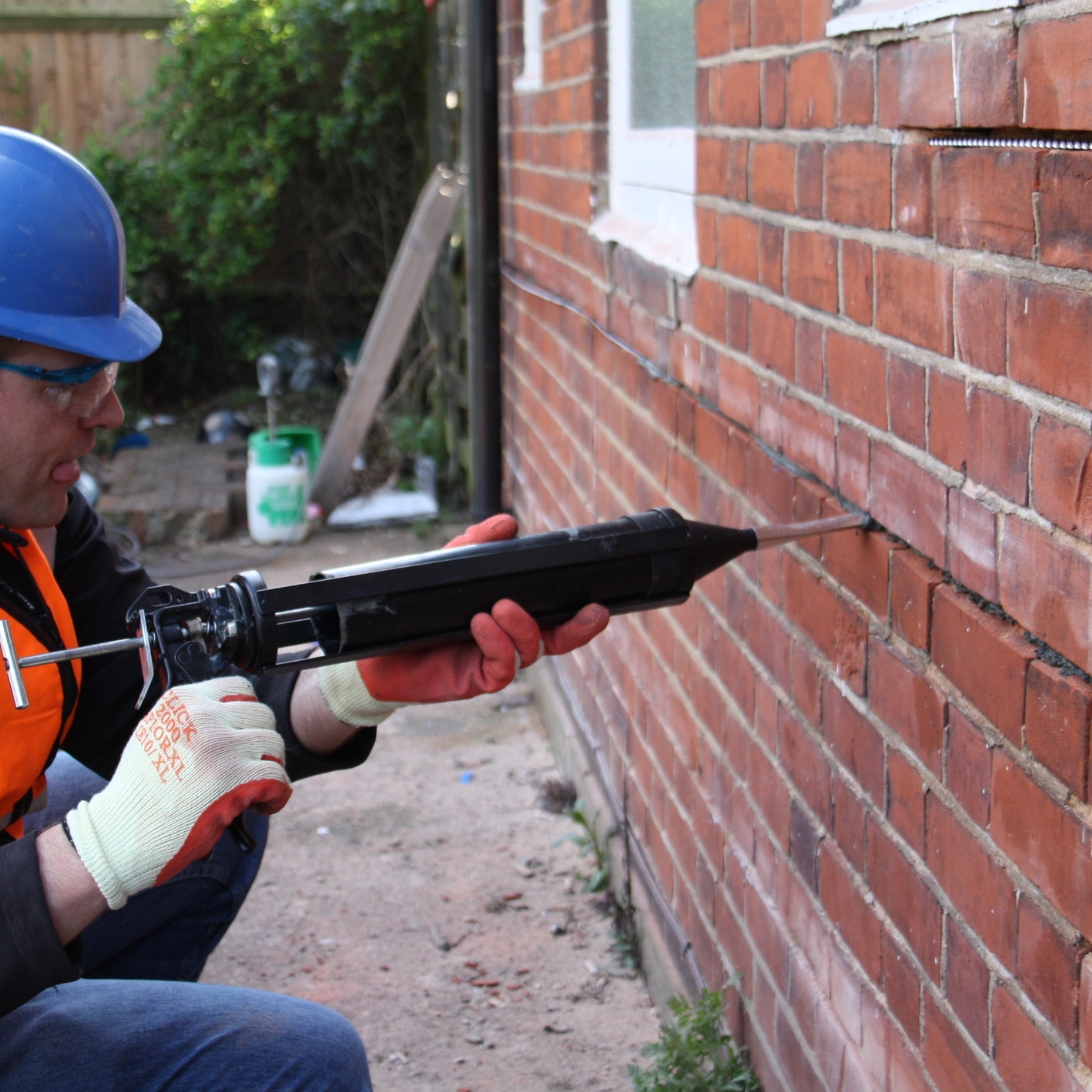
Step 3.
Using the CS Pointing Gun Kit, inject a bead of Helifix HeliBond to the back of the slot.
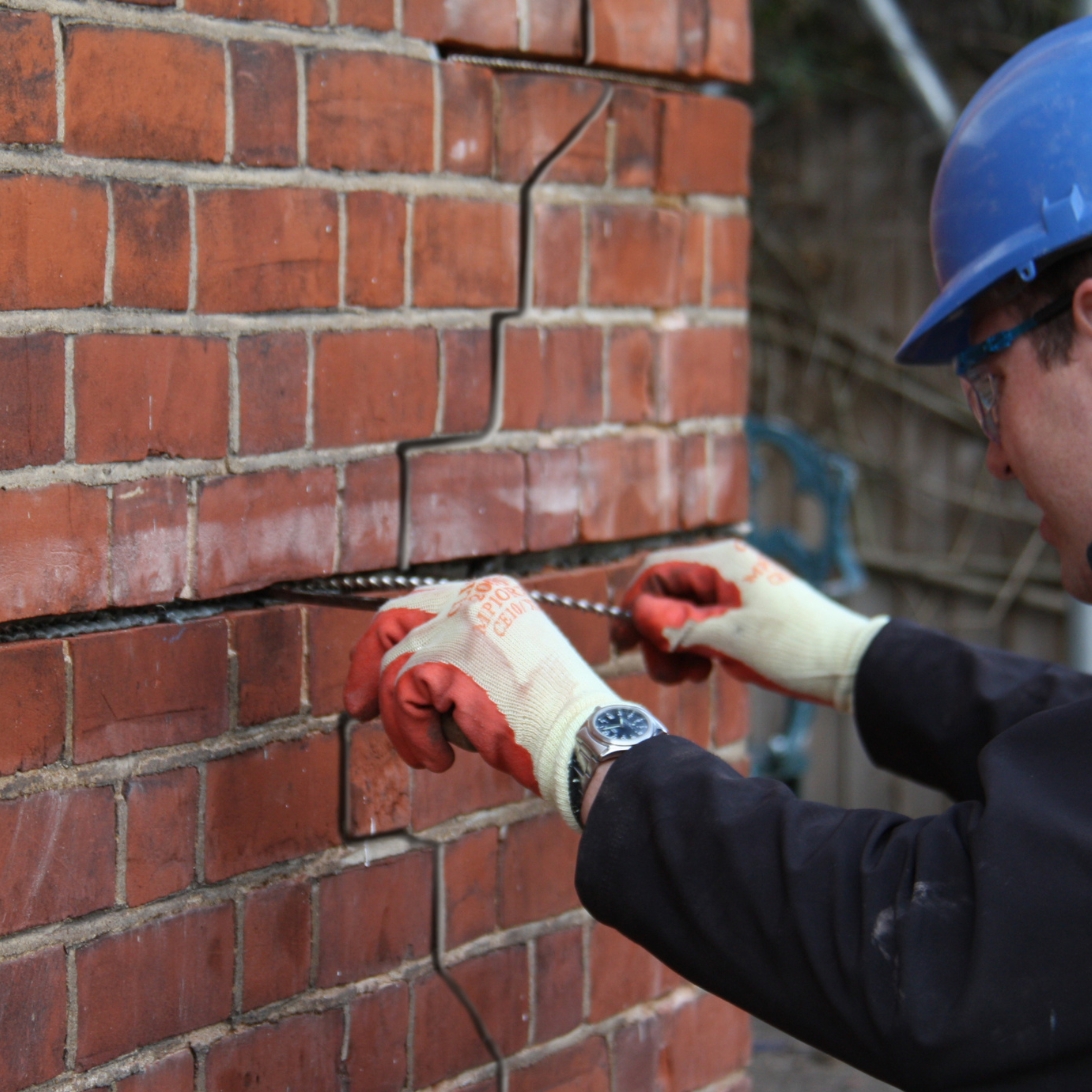
Step 4.
Using a finger trowel, or similar, push the Helifix HeliBar into the grout to obtain good coverage.
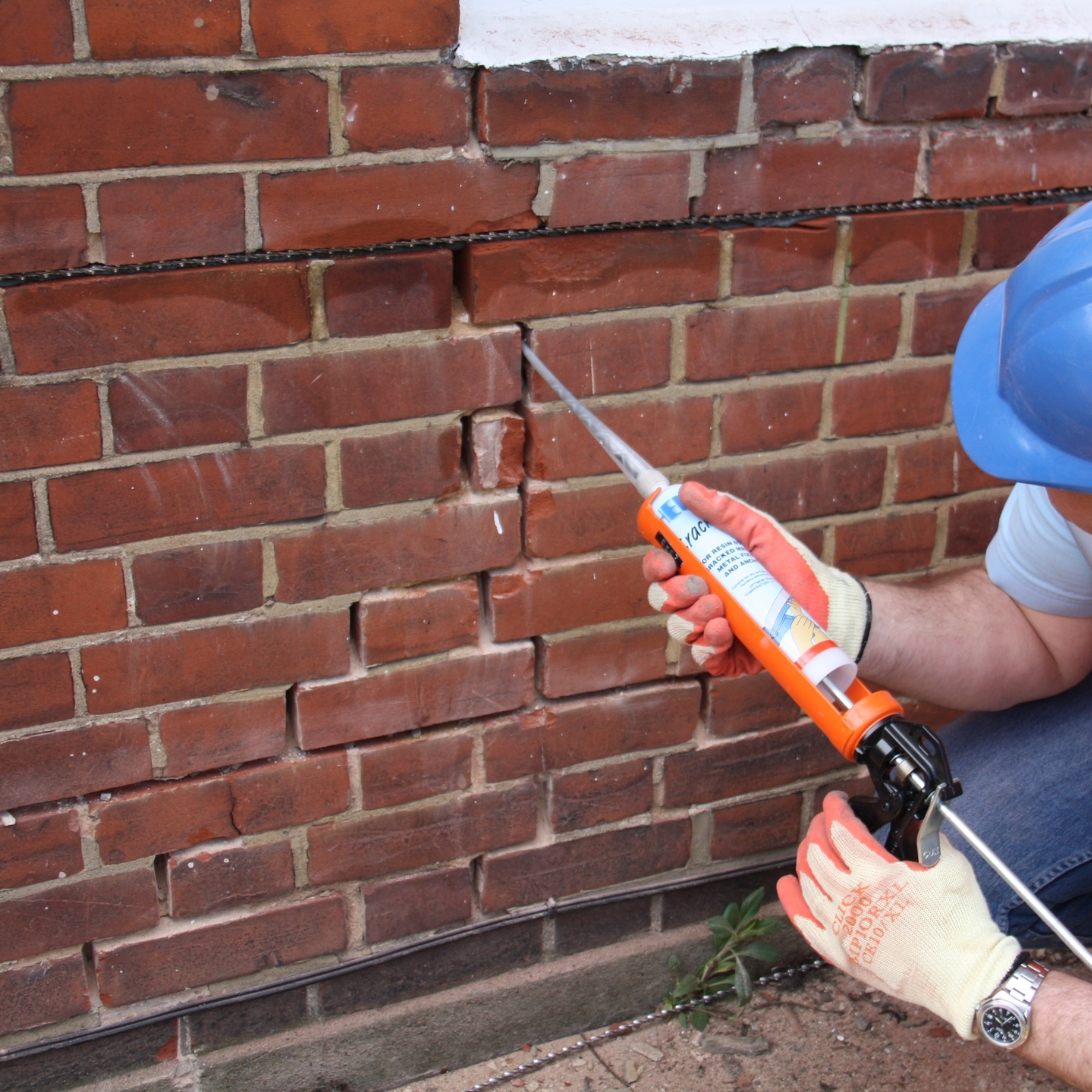
Step 5.
Insert a further bead of Helifix HeliBond over the exposed Helifix HeliBar, finishing 10-15mm from the face, and ‘iron’ into the slot using a finger trowel.
Step 6.
Make good the vertical crack with an epoxy-based weatherproof filler e.g. Helifix Crackbond TE. Repoint the mortar bed and make good.
Product Enquiry
Mandatory Fields*
Find an Approved Installer
Helifix’s Approved Installers ensure customers can be confident that repairs are carried out using the latest techniques to obtain an efficient, reliable, cost-effective solution.
Find an approved installer